An art blog less about process and theory, and more of a portfolio for me to dump my nonsense. Updates M, W, F, or whenever I feel like it.
Showing posts with label Sculpture. Show all posts

Thursday, January 16, 2014

Genitalia

Specifically ant genitalia. . .
Even more specifically, a 130x scale replica of half of a male Formica obscuripes genital capsule.


^ Ectal view of the three main components.                                    Ectal view of the penisvalva and volsellus.  ^


^ Mesal view of the three main components.                         Mesal view of the three main components (exploded).  ^
Click to enlarge! (insert male-enhancement joke here)

These models were sculpted from my go-to medium (you guessed it) super sculpey, and gifted to my lab's former technician, Brendon Boudinot, before he moved back to California. Brendon is one of the world's experts on male ants and I could think of no better way to send him off than with a giant copy of what he frequently talked about with strangers: ant junk. The parts of the male genital capsule have robust setae (represented by copper wire), and though they are typically connected with muscle and thinned cuticle, here they are entirely disassemblable.

Just to make sure you don't think I crudely threw together some ridiculously shaped blobs and tried to pass them off as representations of a biological wonder, I've included some diagrams of Formica obscuripes genitalia from Brendon's recent functional morphology paper:

        Boudinot, B. E. (2013). The male genitalia of ants: musculature, homology, and functional
                   morphology (Hymenoptera, Aculeata, Formicidae). Journal of Hymenoptera
                   Research, 30, 29-49.


Wednesday, March 27, 2013

Spring-time Mega-post!


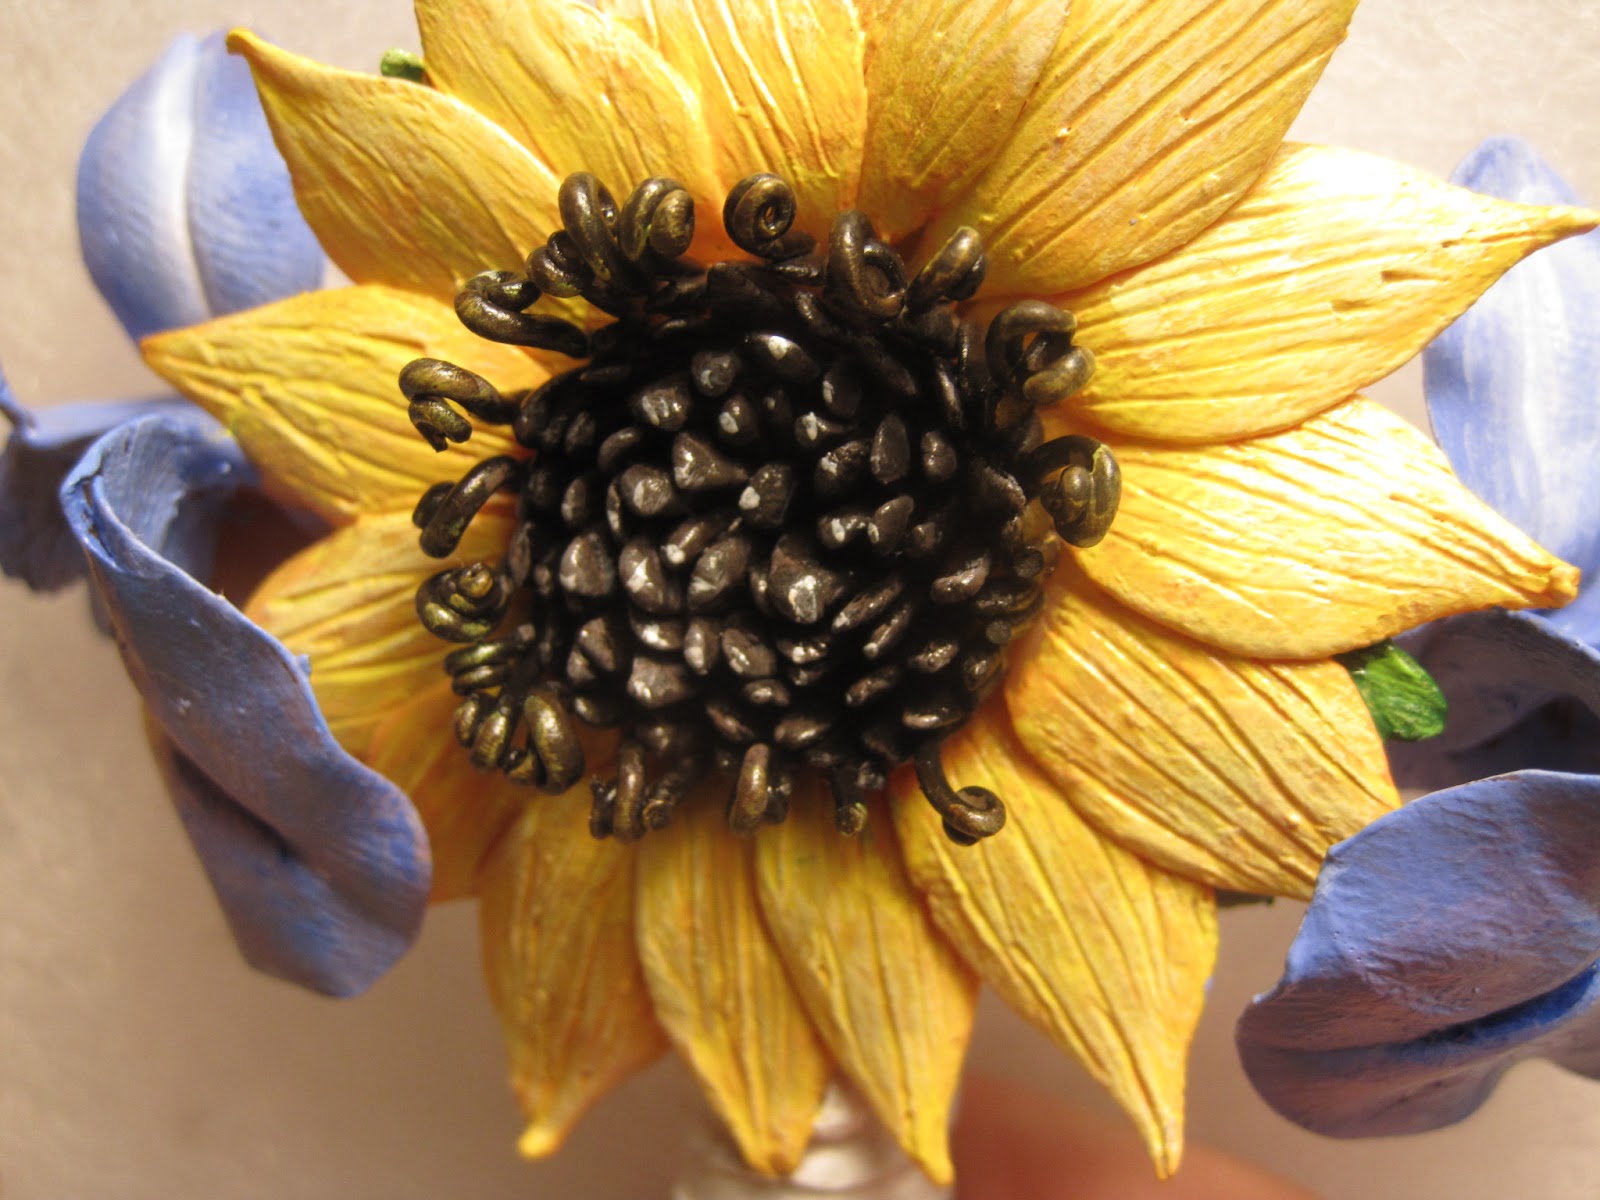
What better way to celebrate the advent of spring than with bouquets of flowers? These ones happen to be made of clay, but still convey the burgeoning splendor of the season.
These are a series of sculptures that I made for family members a few years ago: the first two are Christmas tree ornaments gifted to my sisters Sarah and Elise respectively. The ornaments are replicas of their weddings bouquets. I made one a few months ago for my sister Anais, as she was recently married last May, but I have yet to take any photos of it (her wedding bouquet was calla lilies and freesia). The third bouquet posted here is a brooch I gave to my grandmother.

Each sculpture went through my usual M.O.: super sculpey baked at 275 deg. (with finer details baked previous to bouquet assembly), painted with acrylics, and sprayed with a fixative finish.

Tulips and roses:


Sunflower and irises:


Calla lily and tulips:

Saturday, October 20, 2012

A wee bit devilish

Here's last year's pumpkin:
Here's last year's pumpkin with a candle in it :-)
It's supposed to be a little imp hiding behind a leaf in the underbrush. The hardest part, but most satisfying in the end, was shaving down the leaf to a minimal width that would allow a fair amount of light through and show the silhouette of the imp behind it.
This was largely carved by dremel although the big spaces were taken out with a knife. I cut too close on the tail and the ears and ended up clipping them off, but it was easy enough to reattach them with little pieces of toothpick. On Halloween night, some drunk asshole put his knee through it--an unfortunate fate, but this sort of art is always ephemeral anyhow.

Thursday, October 11, 2012

October

Time for a batch of Halloweeny posts (i.e. pumpkins and costumes)! True, it's been October for almost 2 weeks, but I've been out canyoneering in SW Utah. I'll start off with my costume from last year: the Egyptian deity Horus.

I started with a clay mask that I sculpted directly on my face because I had nothing else to lay it on to keep its shape. I packed tin foil onto my face and began laying on slabs of clay. After I had the right form, I found that it would stand up if placed over two upside-down kitchen bowls--one big (forehead), one small (chin). From there, I finished the details: semi-circle cuts for a feathered look, nostrils, shaping the eyes, etc.

-Here's the mask in the oven:
Then, as with anything else I make with super sculpey, I painted it with acrylics and sprayed it with a finish/fixant. The colors are based off of the peregrine falcon, with a few creative liberties to accommodate for a human contour.

-Profile:                                                                  -3/4 angle:


The rest of the costume was essentially a black leotard with a white Egyptian-style loincloth and an ochre cloth head-dress. Unfortunately, only one picture of me fully dressed exists, and I don't currently have it. As soon as I get it I'll update this post.

Now to start brainstorming for this years costume!

Friday, September 28, 2012

Veggie corks

Last year I spent a week up at UALR's research cabin on the Buffalo River with my lab mate and good friend Dr. Robin Verble. She often commented on the row of glass bottles with vegetable-themed corks that stood perched upon the fridge; it usually entailed a desire to steal them. Thus, when she got married several months later I decided to give her the next best thing: home made reproductions.
They were a ton of fun to make although I don't think I got all of the vegetables right. There was an eggplant instead of the asparagus, and some other thing in place of the corncob. One particular thing I loved was how the best way to make most of these was to combine small sculpted components rather than molding the whole vegetable from a solid piece of clay; I felt it really spoke to the composite nature of plants.

Each of these goes with a square glass bottle about 2 inches tall.

Wednesday, August 22, 2012

More ants

To anybody seeing these posts that doesn't really know me, I study ants. I find them inspiring marvels of evolutionary innovation and they tend to have an impact on my artistic endeavors, hence many an ant post.

Today - Ant sculptures given to the members of the Ward lab at UCDavis when I volunteered there:
Click the genus names to see images of the actual ants they're based on.

Crematogaster


Eurhopalothrix


As with any sculpture involving many intricate appendages, the creation of these ants involved making all of the legs, stings, mandibles, antennae, and even spatulate hairs ahead of time. These were then all baked so that they would retain their shape when inserted into the main body. The legs in particular had wire running through the middle terminating with an exposed hook to ensure they would stay attached (baked clay doesn't bond very well with unbaked clay). Each head and main body segment had balled up tinfoil as a core to conserve clay and make the sculpture lighter. I do that with pretty much everything.

I also tried to make an Amblyopone almost twice the size of these while in Panama, but the humidity made the clay flaky and the the smaller parts got burnt and brittle especially due to being baked twice.


Friday, August 17, 2012

The Golden Snitch

Behold!


I made this snitch  in 2007 as a gift for a friend before you could just buy one at the store. I placed it in a box that I covered in paper and ink to make it look a tad more regal. On one side there are swirling engravings and on the other side is a very poorly translated inscription reading "We'll lead as two kings" in Latin, although it more than likely says something like "Us reigning as how king twins."

The snitch was made with oven bake clay packed around a wooden core, and metallic origami paper over jeweler's wire for the wings. I carved a small compartment inside the wooden core to house secret messages, jewels, drugs, teeth, monkey tears, demon souls, etc. The etchings in the surface were made after a pre-bake (a half cook time to stiffen the clay without fully setting it) in order to avoid warping on the surface. Pre-bakes are great if you ever need to carve a design into a sculpture or you want to make straight cuts that will hold their shape, particularly if you're going for a hewn stone look. The swirling lines and the inscription we stained with a brown ink wash: coating the piece in watered-down ink/paint that seeps into recesses and then wiping off the excess on the surface.

It doesn't fly, but it looks pretty sweet.

Sunday, August 12, 2012

My very first clone machine!

Over the past couple of weeks I've been messing around with urethane plastics and resins to create molds for casting sculptures. I've succeeding in breaking one of my favorite pieces and melting the corner off of my desk, but lo, I've finally succeeded!

I used Smooth-On brand rubbers and plastics and followed their very helpful tutorial videos. The main hiccup was finding the right area on the model to make the seam so that I could easily remove the mold without damaging the mold or the original. To see the piece I molded in better detail, click here. I ended losing about half of the original's hair, its ear, a leech on the shoulder, and the tip of the breathing apparatus. With a couple of carefully placed cuts in the mold I'm now able to get replicates that are completely intact without leaving bits in the mold (it also helps that the resin is less brittle than the original's sculpey form).

I used a quick-cure formula in my first attempt, and the resin started setting as I was pouring it into the mold. The catalyzed reaction burnt my fingers even through my glove so I dropped the melted cup on my desk which is now a warped mess. The picture above shows my second try which I went into much better prepared. The finished result unfortunately has a lot of bubbles, but every cast I do I learn more about the process.
Now I can paint copies and give/sell them to people. I'll add more pictures to this post once I've put a base coat of paint on so that the details are visible rather than transparent.

If anybody wants a monster to paint I'll happily make you a copy :-)

Monday, July 23, 2012

Otch

Today's piece is the second in a series of busts created without any foresight. As with the piece presented 9/12/2010, the only direction going in was that it should be an organism of indeterminate sentience seen from the shoulders up. I've entitled this one "Otch."

As with most posts, please click the photos to see them better.


The bust is about the size of a softball. Otch wears a large winter coat, a scarf, and a monocle. His eyes are suspended between stalks so that they can swivel 360 degrees. He is currently investigating a small stone covered in runes and has a set of tinkering tools for . . . whatever it is he does. The gill-like flaps on his chin and the hexagonal pits on his face could be sensory organs or ornamental--who knows.


As with the previous bust, I haven't painted it yet in hope of casting it someday. I've come to realize, however, that there are too many gaps, loops, and fragile bits to make a functional mold so this one will remain one of a kind. In my future sculpting I need to start taking that into consideration.

I look forward to continuing the series. A story may even begin to emerge with enough characters to draw from!


Wednesday, October 27, 2010

I need a dremel!


Here's the pumpkin I carved last weekend!!

It was a white-skinned pumpkin about the size of a head, so I couldn't pass up the chance to make a skull.

I used an assortment of knives, but primarily a dremel which I had never used before. For those who don't know, a dremel is a rotary power tool with various sanding and drilling bits usually used for metal working, jewelery making. . . etc.

It'd be pretty sweet to light it on fire and make a headless horseman costume =)

Tuesday, October 19, 2010

More unpainted sculpture . . .

Here's a bird I gifted to my mum.
It's a Chickadee.


In order to retain the shape of delicate protrusions (e.g., the beak, the legs, etc.), sculpt them ahead of time and bake them by themselves. Then they'll be rigid when you need to add them to the finished piece. This works GREAT with sharp spines and teeth!

Sunday, September 12, 2010

Apparently pinching doesn't work

Last night I had a dream where my teeth were falling out. It's one I have fairly consistently, and as a result, I became aware this time that it was likely unreal. In the dream I began to pinch myself with increasing force, but nothing happened and the dream proceeded as normal. When I woke up it took me a while to remember that it had happened, but I seem to have lost a little faith in reality.

Moving on. Here's a sculpture I did last February (2010). I didn't have anything in mind when I started making it, so its form was plucked from the aether and surprised me as it manifested.

Maybe one day it will be painted, and as long as we're dreaming, I'd really like to make a cast of it and make resin replicas. We'll see how that goes.

I only have a little scrap of Sculpey left and I haven't been able to find anywhere to buy more in Arkansas yet, so my sculpting may cease for the time being.


May you always wake up when you want to,
-Theo